- the main image of the presenter
I wanted to change the brightness of the image and adjust the contrast. I therefore opened the image in Adobe Photoshop and used the controls to adjust the image.
This is the final image after I had edited it.
[Update 21/1/12- I have decided to include an extra image of a Twitter bird in my double page spread as it currently looks a bit bare. I will edit this photo in InDesign and change the transparency of it so I can place the image behind text. Below is how I edited the image.]
I got the image from the Internet so copyright applies to it. However, as it's for educational purposes I am allowed to use it. The website I got the image from is: http://ipswhatsup.blogspot.co.uk/2009/04/can-i-get-that-in-twitter.html. Here is the image before I edited it.
I adjusted the transparency level using the effects tool in Adobe InDesign.
Below is the edited image which can be easily placed behind text.
[Update 24/1/12- I have decided to include a new main image and the BBC 3 logo. I have edited the new images as followed.
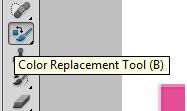
 Here I wanted to change the colour of the pink in the BBC 3 logo so it would co-ordinate with my house style and colour scheme of FaceBook blue. I used the colour replacement tool in Adobe Photoshop to select the pink text and replaced it with a FaceBook blue colour. Below is what the image looked like before.
 Here I have edited the new main image. This is the original picture. As you can see there are several imperfections in the picture. For example, the bin, person and sand pits in the background.
 I therefore opened the image in Adobe Photoshop and used the healing tool to edit these imperfections out.
 I then used the lasso tool to select the presenter out of the picture. I then applied the feather effect so the edges were smoother and once it was placed into InDesign it would mold well with the background colours in my double page spread.]


No comments:
Post a Comment